WCF服务svc文件详解
2019/7/9 0
WCF服务的宿主程序主要包括:三种,这篇文章中将具体讲述如何把一个WCF服务寄宿到IIS上面。
一、新建一个WCF服务应用程序:
文件->新建->项目:选择WCF下面的WCF服务应用程序

二、分析WcfSvcDemo项目,该项目的结构如下:
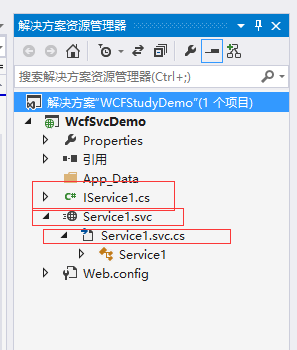
在该项目中,会默认生成一个IService1.cs的文件和Service1.svc文件。Service1.svc文件封装的就是提供给客户端的服务引用。
首先查看IService1.cs文件,从名字上面就可以看出这是一个接口文件,里面定义了一个接口IService1,接口上面使用了ServiceContract,意思是把这个接口声明为服务契约,服务契约是对客户端而言的,就是这个接口可以暴露出来让客户端可以看见。接口里面定义了两个方法,每个方法上面都使用了[OperationContract],意思是把这两个方法声明为操作契约。只有把接口里面的方法声明为操作契约,在客户端里面才可以看到相应的方法,否则在客户端里面看不到在接口里面定义的方法。
在来看Service.svc文件,可以看到下面有一个Service.svc.cs文件,这个文件里面定义了一个继承IService1接口的类Service1,并实现了IService1接口里面的方法。
删除Service.svc.cs文件,可以查看Service.svc文件,该文件里面就一行代码;
1 <%@ ServiceHost Language="C#" Debug="true" Service="WcfSvcDemo.Service1" CodeBehind="Service1.svc.cs" %>
这里面有两个重要的参数:Service和CodeBehind。Service是属性值是WCF的服务实现类的完全限定名。CodeBehind是服务实现类所在的文件名。在运行的时候,宿主程序从svc文件中的Service属性得到WCF服务的完全限定名,然后从配置文件中找到同名的servicce,进而找到所有的EndPoint,并根据其属性进行实例化。
配置文件中的Service名字必须是Service类名的完全限定名(即Namespace.classname),EndPoint的Contract必须是Service接口的完全限定名。否则,程序就无法从程序集中找到相应的类进行加载。
注意:如果要修改接口实现类的名称,必须使用“重构”的方式进行修改,因为只有利用“重构”的方式修改Servie类名的时候,.svc文件里面Service的属性值才会被修改,利用其它方式修改类名,.svc文件里面Service的属性值会保留原值,这样在运行的时候,根据svc里面Service的属性值查找不到相应的类,程序就会报错。
svc文件里面还有一个重要的参数:ServiceHostFactory。ServiceHostFactory旨在解决从IIS或WAS中访问自定义ServiceHost的问题。因为从ServiceHost派生的自定义宿主是动态配置的并且可能为各种类型,所以宿主环境从不会直接将其实例化。相反,WCF使用工厂模式提供宿主环境和服务的具体类型之间的间接层。除非进行通知,否则它使用返回ServiceHost的实例的ServiceHostFactory的默认实现。(在新建的svc文件中默认实现就是CodeBehind属性的值)。但也可以通过在@ServiceHost指令中指定工厂实现的CLR类型名称来提供自己的工厂(用于返回派生宿主)。
下面是用于返回派生的ServiceHost的自定义ServiceHostFactory:
1 using System; 2 using System.Collections.Generic; 3 using System.Linq; 4 using System.Text; 5 using System.ServiceModel; 6 using System.ServiceModel.Activation; 7 8 namespace Public.CustomService 9 { 10 public class CustomServiceHostFactory : ServiceHostFactory 11 { 12 protected override ServiceHost CreateServiceHost(Type serviceType, Uri[] baseAddresses) 13 { 14 CustomServiceHost customServiceHost = new CustomServiceHost(serviceType, baseAddresses); 15 return customServiceHost; 16 } 17 } 18 }
其中CustomServiceHost是自定义的继承自ServiceHost的类,用于读取配置文件的配置,CustomServiceHost类的定义如下:
1 using System; 2 using System.Collections.Generic; 3 using System.Linq; 4 using System.Text; 5 using System.ServiceModel; 6 using System.ServiceModel.Activation; 7 8 namespace Public.CustomService 9 { 10 public class CustomServiceHost :ServiceHost 11 { 12 public CustomServiceHost(Type serviceType, params Uri[] baseAddresses) 13 : base(serviceType, baseAddresses) 14 { 15 //加载Web.config的配置 16 log4net.Config.XmlConfigurator.Configure(); 17 } 18 protected override void ApplyConfiguration() 19 { 20 base.ApplyConfiguration(); 21 } 22 } 23 }
若要使用此工厂,而不使用默认工厂,则应该在@ServiceHost指令中提供相应的类型名称:
1 <%@ ServiceHost Service="CustomSvcDemo.DatabaseService" Factory="Public.CustomService.CustomServiceHostFactory" %>
其中Service是实现类的完全限定名,Factory是自定义ServiceHostFactory的完全限定名,Public是一个dll文件。
若要使用此工厂,而不使用默认工厂,则应该在@ServiceHost指令中提供相应的类型名称:
尽管对于从CreateServiceHost返回的ServiceHost可以执行什么操作没有技术限制,但建议您尽可能使工厂实现简单化。如果有大量的自定义逻辑,最好将这些逻辑放入宿主内而不是工厂内,以便可以重用它们。
应在这里提及另一个承载API的层。WCF还具有ServiceHostBase和ServiceHostFactoryBase,可从中分别派生ServiceHost和ServiceHostFactory。对于您必须通过自己的自定义创建来交换元数据系统的大型组件的更高级方案,存在上述这些特性。
下面通过两个具体的示例程序分别实现上面描述的默认工厂和自定义工厂。
三、使用默认工厂方式
删除新建项目时自动创建的IService1.cs和Service1.svc文件,然后添加一个svc文件,在项目上面右键->添加->新建项: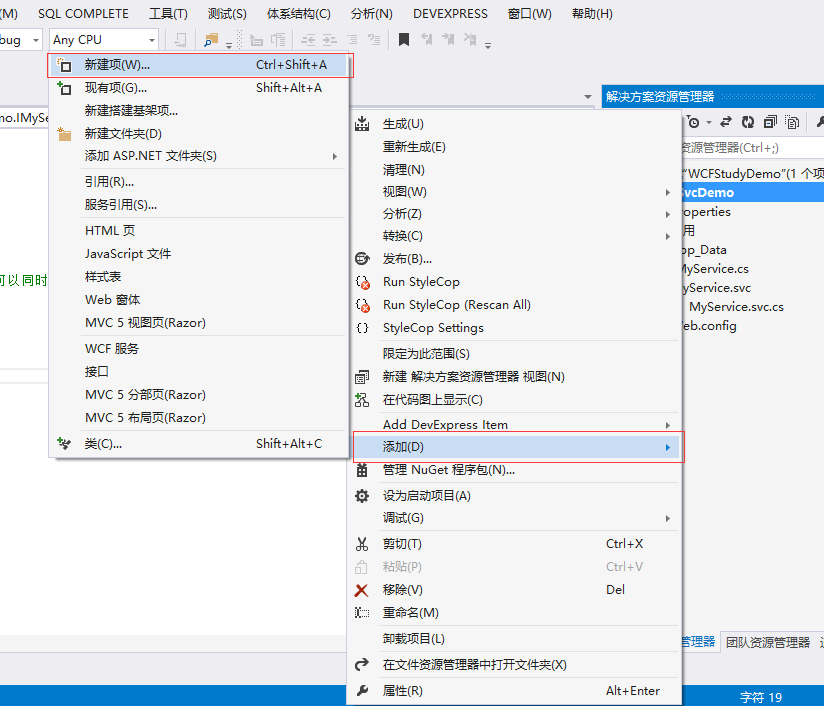
在新建项里面选择web里面的WCF服务,命名为MyService:

点“添加”,除了创建MyService.svc文件以外,还会自动创建一个名为IMyService.cs的接口文件,MyService.svc.cs里面的MyService默认实现IMyService接口.
删除IMyService接口里面自动生成的方法,添加一个GetCurrentTime的方法,用来返回当前的时间,IMyService接口定义如下:
1 using System; 2 using System.Collections.Generic; 3 using System.Linq; 4 using System.Runtime.Serialization; 5 using System.ServiceModel; 6 using System.Text; 7 8 namespace WcfSvcDemo 9 { 10 // 注意: 使用“重构”菜单上的“重命名”命令,可以同时更改代码和配置文件中的接口名“IMyService”。 11 [ServiceContract] 12 public interface IMyService 13 { 14 /// <summary> 15 /// 获取当前时间 16 /// </summary> 17 /// <returns></returns> 18 [OperationContract] 19 DateTime GetCurrentTime(); 20 } 21 }
4、MyService.svc.cs里面的MyService类实现IMyService接口,MyService类定义如下:
1 using System; 2 using System.Collections.Generic; 3 using System.Linq; 4 using System.Runtime.Serialization; 5 using System.ServiceModel; 6 using System.Text; 7 8 namespace WcfSvcDemo 9 { 10 // 注意: 使用“重构”菜单上的“重命名”命令,可以同时更改代码、svc 和配置文件中的类名“MyService”。 11 // 注意: 为了启动 WCF 测试客户端以测试此服务,请在解决方案资源管理器中选择 MyService.svc 或 MyService.svc.cs,然后开始调试。 12 public class MyService : IMyService 13 { 14 /// <summary> 15 /// 返回当前时间 16 /// </summary> 17 /// <returns></returns> 18 public DateTime GetCurrentTime() 19 { 20 return DateTime.Now; 21 } 22 } 23 }
5、修改配置文件,增加service、binding等节点,修改后的配置文件如下:

1 <?xml version="1.0"?> 2 <configuration> 3 <appSettings/> 4 <system.web> 5 <compilation debug="true" targetFramework="4.0"/> 6 <httpRuntime/> 7 </system.web> 8 <system.serviceModel> 9 <services> 10 <service behaviorConfiguration="metadataBehavior" name="WcfSvcDemo.MyService"> 11 <endpoint address="" binding="basicHttpBinding" bindingConfiguration="Contract" name="MyService" contract="WcfSvcDemo.IMyService"/> 12 </service> 13 </services> 14 <behaviors> 15 <serviceBehaviors> 16 <behavior name="metadataBehavior"> 17 <!-- 为避免泄漏元数据信息,请在部署前将以下值设置为 false --> 18 <serviceMetadata httpGetEnabled="true" httpsGetEnabled="true"/> 19 <!-- 要接收故障异常详细信息以进行调试,请将以下值设置为 true。在部署前设置为 false 以避免泄漏异常信息 --> 20 <serviceDebug includeExceptionDetailInFaults="false"/> 21 </behavior> 22 </serviceBehaviors> 23 </behaviors> 24 <bindings> 25 <basicHttpBinding> 26 <binding name="Contract" closeTimeout="00:00:05" openTimeout="00:00:05" receiveTimeout="11:00:00" sendTimeout="11:00:00" maxBufferSize="2147483647" maxBufferPoolSize="2147483647" maxReceivedMessageSize="2147483647" transferMode="Buffered"> 27 <readerQuotas maxDepth="32" maxStringContentLength="2147483647" maxArrayLength="16384" maxBytesPerRead="4096" maxNameTableCharCount="16384"/> 28 </binding> 29 </basicHttpBinding> 30 </bindings> 31 <protocolMapping> 32 <add binding="basicHttpsBinding" scheme="https"/> 33 </protocolMapping> 34 <serviceHostingEnvironment aspNetCompatibilityEnabled="false" multipleSiteBindingsEnabled="true"/> 35 </system.serviceModel> 36 <system.webServer> 37 <modules runAllManagedModulesForAllRequests="true"/> 38 <!-- 39 若要在调试过程中浏览 Web 应用程序根目录,请将下面的值设置为 True。 40 在部署之前将该值设置为 False 可避免泄露 Web 应用程序文件夹信息。 41 --> 42 <directoryBrowse enabled="true"/> 43 </system.webServer> 44 </configuration>
主要是修改service节点里面的name是服务实现类的完全限定名,contract是服务接口的完全限定名。
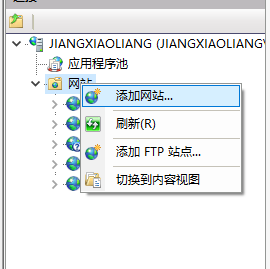
6、把WCF服务部署到IIS上面
在IIS上面网站->添加网站:
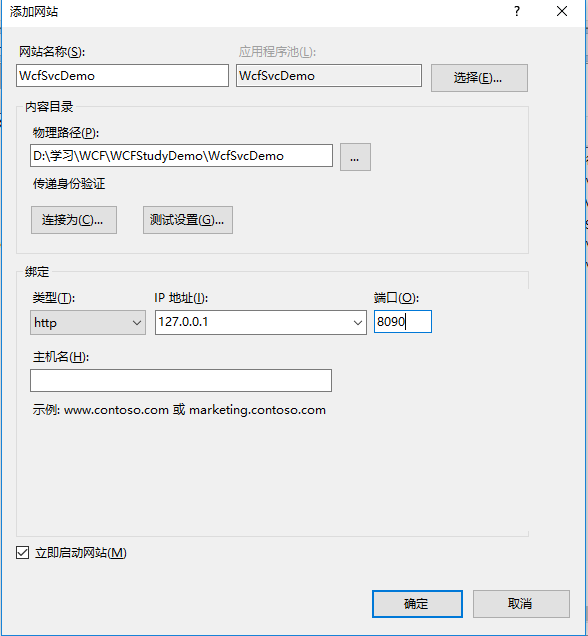
配置网站名称、路径、IP地址和端口:
网站配置完成以后,浏览.svc文件,验证网站是否配置成功,如出现下面的截图,说明网站配置成功:

7、创建代理类
客户端引用WCF的时候一般是静态引用,直接添加服务引用,这种方式如果IP地址和端口号变了,需要用代码重新编译然后在部署,这样不方便。这里使用svcutil代理类的方式进行客户端的调用。
使用svcutil生成代理类:
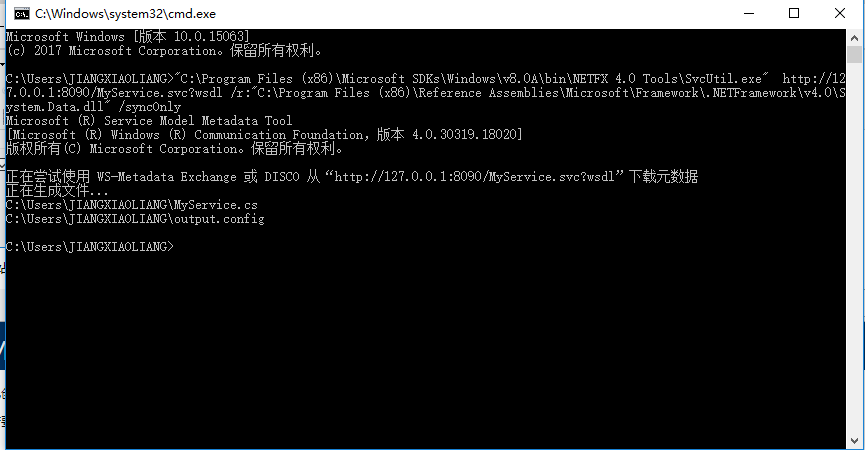
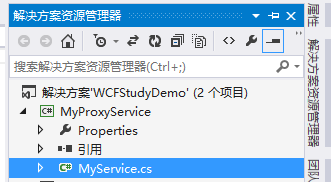
新建一个项目,选择类库项目,把刚才生成的类文件添加到类库项目中,项目结构如下:
在类库项目中新添加一个类,命名为:MyServiceProxy,使用这个类来调用代理类,MyServiceProxy类的定义如下:
1 using Public.ConfigBinding; 2 using System; 3 using System.Collections.Generic; 4 using System.Configuration; 5 using System.Linq; 6 using System.ServiceModel; 7 using System.Text; 8 using System.Threading.Tasks; 9 10 namespace MyProxyService 11 { 12 public class MyServiceProxy 13 { 14 private static MyServiceClient _databaseService; 15 16 private static MyServiceClient DatabaseService 17 { 18 get 19 { 20 if (_databaseService == null) 21 { 22 string sApServer1 = ConfigurationManager.AppSettings["ApServer1"]; 23 24 if (sApServer1 == null) 25 { 26 _databaseService = new MyServiceClient(); 27 } 28 else 29 { 30 EndpointAddress endPointAddr = new EndpointAddress(string.Format("{0}/MyService.svc", sApServer1)); 31 _databaseService = new MyServiceClient(HttpBinding.BasicHttpBinding, endPointAddr); 32 } 33 } 34 35 if (_databaseService.State == CommunicationState.Faulted) 36 { 37 string sApServer2 = ConfigurationManager.AppSettings["ApServer2"]; 38 39 if (sApServer2 == null) 40 { 41 _databaseService = new MyServiceClient(); 42 } 43 else 44 { 45 EndpointAddress endPointAddr = new EndpointAddress(string.Format("{0}/MyService.svc", sApServer2)); 46 _databaseService = new MyServiceClient(HttpBinding.BasicHttpBinding, endPointAddr); 47 } 48 } 49 50 return _databaseService; 51 } 52 } 53 54 /// <summary> 55 /// 返回当前时间 56 /// </summary> 57 /// <returns></returns> 58 public static DateTime GetCurrentTime() 59 { 60 return DatabaseService.GetCurrentTime(); 61 } 62 } 63 }
ApServer1和ApServer2是在配置文件中配置的IP地址和端口号,这样如果IP地址和端口号变了,只需要修改配置文件就可以。
GetCurrentTime()方法是调用的代理类里面的方法,把该方法定义为静态方法。
8、创建客户端调用
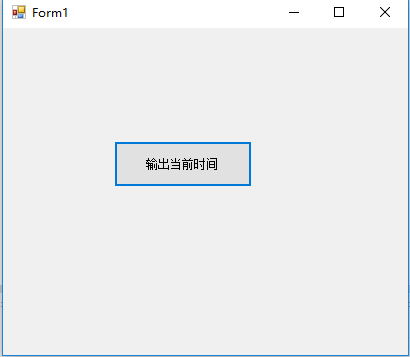
在解决方案中,新建一个winform程序,界面上面只有一个button按钮,点击按钮,弹出当前时间。需要添加对MyProxyService.dll文件的引用,在配置文件中增加ApServer1和ApServer2两个节点,配置文件如下:
1 <?xml version="1.0" encoding="utf-8"?> 2 <configuration> 3 <appSettings> 4 <add key="ApServer1" value="http://127.0.0.1:8090"/> 5 <add key="ApServer2" value="http://127.0.0.1:8090"/> 6 </appSettings> 7 <startup> 8 <supportedRuntime version="v4.0" sku=".NETFramework,Version=v4.0"/> 9 </startup> 10 </configuration>
button按钮事件代码如下:
1 using System; 2 using System.Collections.Generic; 3 using System.ComponentModel; 4 using System.Data; 5 using System.Drawing; 6 using System.Linq; 7 using System.Text; 8 using System.Threading.Tasks; 9 using System.Windows.Forms; 10 using MyProxyService; 11 12 namespace WinformClient 13 { 14 public partial class Form1 : Form 15 { 16 public Form1() 17 { 18 InitializeComponent(); 19 } 20 21 private void btn_CurrentTime_Click(object sender, EventArgs e) 22 { 23 DateTime dtNow = MyServiceProxy.GetCurrentTime(); 24 MessageBox.Show("当前时间:" + dtNow.ToString()); 25 } 26 } 27 }
点击按钮后,运行结果如下:
四、使用自定义工厂的方式
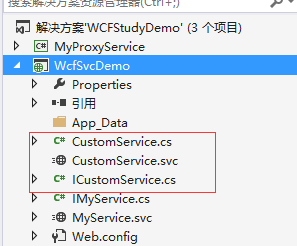
1、新添加一个WCF服务,命名为CustomService,把默认生成的CustomService.svc.cs文件删掉,重新添加一个类:CustomService,该类继承自生成的ICustomService接口,项目结构如下:
修改CustomService.svc文件:
1 <%@ ServiceHost Service="WcfSvcDemo.CustomService" Factory="Public.CustomService.CustomServiceHostFactory" %>
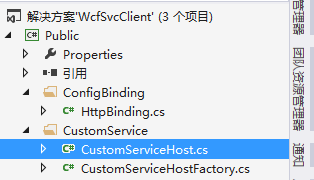
CustomServiceHostFactory是在另外的Public.dll里面创建的工厂类,用来返回ServiceHost,Public.dll的项目结构如下:
CustomServiceHost类继承自ServiceHost类,代码如下:
1 using System; 2 using System.Collections.Generic; 3 using System.Linq; 4 using System.Text; 5 using System.ServiceModel; 6 using System.ServiceModel.Activation; 7 8 namespace Public.CustomService 9 { 10 public class CustomServiceHost :ServiceHost 11 { 12 public CustomServiceHost(Type serviceType, params Uri[] baseAddresses) 13 : base(serviceType, baseAddresses) 14 { 15 //加载Web.config的配置 16 log4net.Config.XmlConfigurator.Configure(); 17 } 18 protected override void ApplyConfiguration() 19 { 20 base.ApplyConfiguration(); 21 } 22 } 23 }
CustomServiceHostFactory是工厂类,继承自ServiceHostFactory,用来返回ServiceHost,代码如下;
1 using System; 2 using System.Collections.Generic; 3 using System.Linq; 4 using System.Text; 5 using System.ServiceModel; 6 using System.ServiceModel.Activation; 7 8 namespace Public.CustomService 9 { 10 public class CustomServiceHostFactory : ServiceHostFactory 11 { 12 protected override ServiceHost CreateServiceHost(Type serviceType, Uri[] baseAddresses) 13 { 14 CustomServiceHost customServiceHost = new CustomServiceHost(serviceType, baseAddresses); 15 return customServiceHost; 16 } 17 } 18 }
HttpBinding代码如下:
1 using System; 2 using System.Collections.Generic; 3 using System.Linq; 4 using System.ServiceModel; 5 using System.Text; 6 using System.Threading.Tasks; 7 using System.Xml; 8 9 namespace Public.ConfigBinding 10 { 11 public class HttpBinding 12 { 13 private static BasicHttpBinding _BasicHttpBinding; 14 15 public static BasicHttpBinding BasicHttpBinding 16 { 17 get 18 { 19 if (_BasicHttpBinding == null) 20 { 21 _BasicHttpBinding = new BasicHttpBinding(); 22 23 // 接收的讯息大小上限,默认值为65,536字节, 24 // 目前设定1k * 512,如果资料量大于这个值,请提出讨论,ex:8000笔资料大概128k 25 _BasicHttpBinding.MaxReceivedMessageSize = 400 * 8192 * 512; 26 27 // 由于回传String长度过长在反串行化时会出错! 28 // 所以放大最大字符串长度 29 _BasicHttpBinding.ReaderQuotas.MaxStringContentLength = 8192 * 1022; 30 _BasicHttpBinding.ReaderQuotas.MaxArrayLength = 8192 * 1022; 31 _BasicHttpBinding.SendTimeout = new TimeSpan(0, 5, 0); 32 33 } 34 35 return _BasicHttpBinding; 36 } 37 } 38 } 39 }
把CustomService.svc部署到IIS上面、创建代理类的方法、客户端调用和默认工厂里面的方法一样,此处不在描述。